Creating a Publication
When the distribution
database has been created and publishing has been enabled on the server,
you can create and configure a publication. In SQL Server Management
Studio, you start by locating the Replication node under the publication server from which you want to publish data (the DBARCH-LT2\SQL08DE01Figure 9 shows the program item option when you right-click the Replication
node under what will be the publication server. As you can see, there
are three options; one to create a new publication, one to create a new
Oracle publication, and one to create a new subscription. named instance in this example).
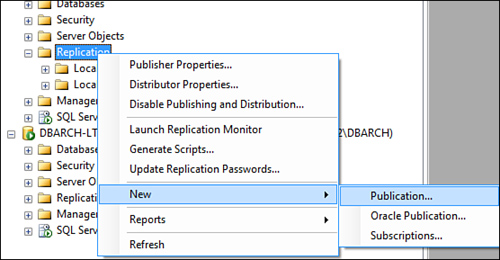
You should choose to create a new publication (the first option). When you do, the New Publication Wizard is launched.
Here’s how you create a new publication:
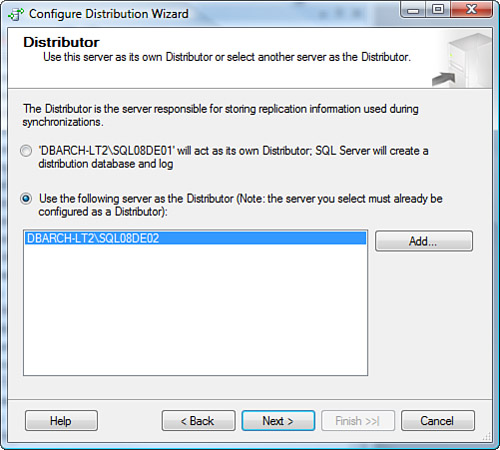
1. | The
first New Publication Wizard page outlines the two things that can be
done with this wizard. The options are “Select the data and database
objects you want to replicate” and “Filter the published data so that
subscribers receive only the data they need.” After this splash page,
you need to specify how you want to distribute the data for this new
publication. As you can see in Figure 10, you should use a remote distributor (the DBARCH-LT2\SQL08DE02 named instance) to distribute data for this new publication you are defining.
|
2. | When
you are asked to provide a password that will be used to establish the
administrative link to the distributor, supply it. It should be the same
one you specified earlier when setting up the distribution server.
|
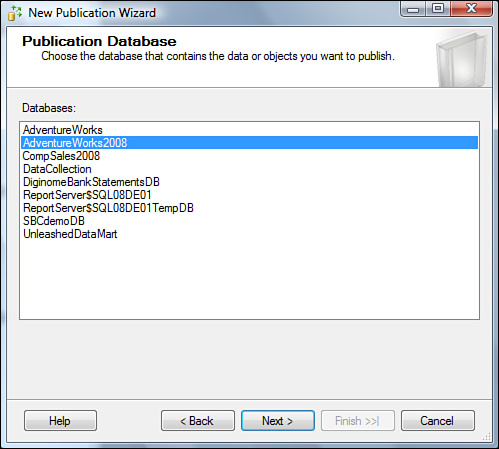
3. | Identify the database on which you are going to set up a publication (see Figure 11). For this example, choose to create a publication on the AdventureWorks2008 database.
|
4. | Choose
the type of replication method for this publication: Snapshot
Publication, Transactional Publication, Transactional Publication with
Updateable Subscriptions, or Merge Publication Method of Replication.
For this example, select Transactional Publication.
|
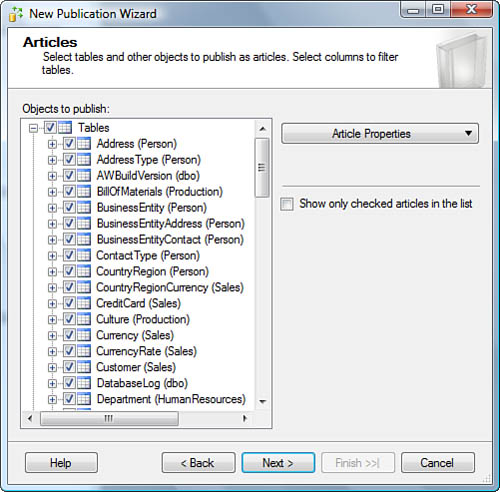
5. | Next,
you are presented with the place where you specify what tables and
other objects to publish. These will become your articles. You can
specify filtering of any selected articles, where appropriate. To keep
this simple, just choose the primary stored procedures, views, indexed
views, user-defined functions, and tables of the AdventureWorks2008 database for this publication. (You do not select any filtering at this time.) Figure 12 shows the Articles specification page. Also in Figure 19.36,
you can view the article properties that dictate how all article
objects should be handled by replication (via the Article Properties
button in the upper-right corner of this wizard screen). An example of
this is specifying the delete delivery format behavior for this
publication (for all tables) to be Do Not Replication Delete Statements
or Use Stored Procedures to Do the Deletes and not individual delete
statements.
The next wizard screen carefully analyzes what you are asking to become
articles and highlights any dependencies that must be considered as part
of replication. A good example of an article issueis that indexed views
require the tables to which they are bound to be part of the
replication.
|
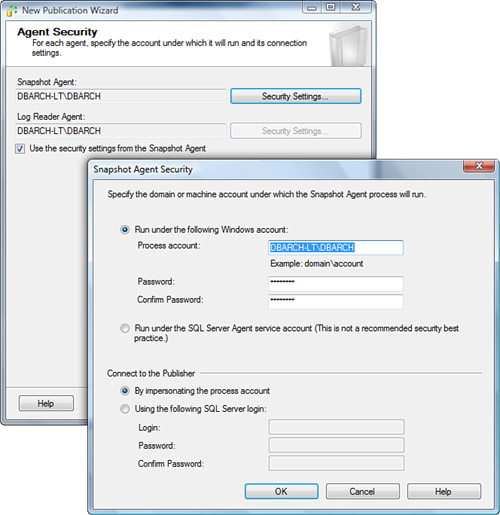
6. | When
the Snapshot Agent wizard configuration screen prompts you to either
create a snapshot immediately or at some scheduled time and to keep the
snapshot available to initialize subscriptions, select to create a
snapshot immediately and keep it available to initialize the
subscription. As part of this snapshot agent creation, you have to
specify under what security credentials you want the agent security to
run. In addition, you can specify if you want the log reader agent to
use the same security settings as the snapshot agent. The rule of thumb
here is to keep it simple and let these agents use the same security
settings (as shown in Figure 13).
|
7. | The
wizard now has enough information to create the publication. When the
wizard actions are summarized for you, choose to create the publication
and generate a script file with all the steps to create the publication
in it. Again, this script generation part is highly recommended. You
certainly don’t want to have to go through this wizard over and over.
Once is enough.
|
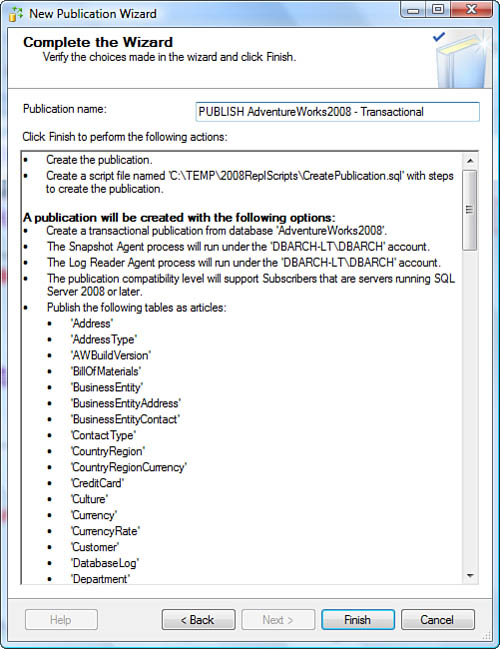
8. | When
the summary of all choices made in the creation of a new publication is
listed in the Complete the Wizard screen, name the publication
appropriately. Your publication names should contain the type of
publication method being used (for example, Snapshot, Transactional, Merge) and any other identifying qualifier that seems appropriate (usually reflecting the scope of the publication). Figure 14 shows this summary of actions and the publication name PUBLISH AdventureWorks2008 - Transactional.
|
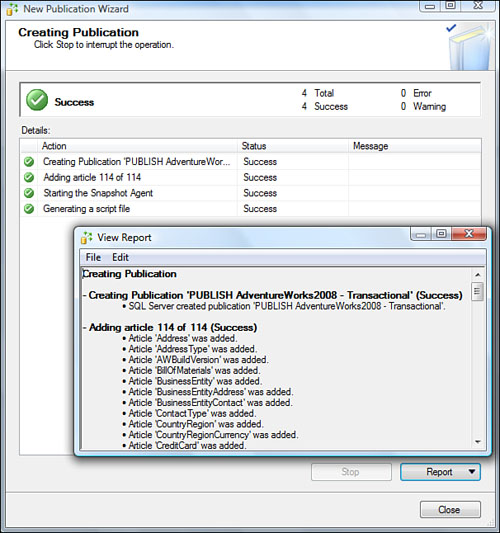
The actual creation of
the publication is next. An action progress screen appears, showing each
step (action) and indicating any errors or warnings occurring in the
publication creation process. To view any errors or warnings, you simply
click the Report button in the lower-right side after the processing
completes. As you can see in Figure 15,
this report lists, by name, all articles created and that the snapshot
agent is starting. This is where all the initial action takes place.
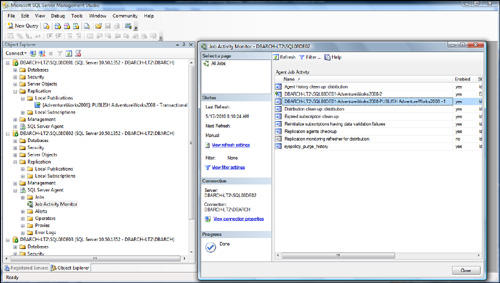
As part of this process,
several new agents (jobs) are added; they implement this publication
using the designated distributor. There are no subscribers yet; they
come later. Figure 16 shows the new jobs (agents) and publication entries. You are now ready to create subscriptions against this publication.
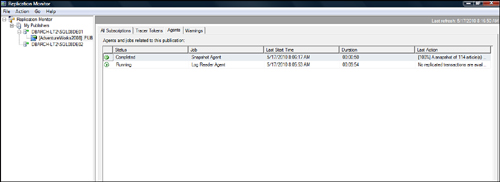
As you can see in Figure 17, if you launch Replication Monitor (from the Replication
node under the publication server), you can see the newly created
publication and its status, and you have access to any servers
subscribing to it (none yet), along with the common replication jobs
that are servicing this publication.
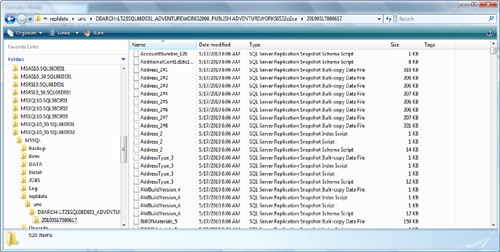
Because you chose to execute
the snapshot immediately, the snapshot executes and utilizes the
snapshot folder to generate the schema files (.sch files), data snapshot files (.bcp), and so on to fully enable a subscription when one is created. Figure 18 shows the contents of the snapshot folder being used for the publication of the AdventureWorks2008
publication. Remember that this folder must be located in a place that
is big enough to contain all the data that will be extracted and used
for the snapshot; plan ahead.